Bulk identify discourse nodes
If your vault already contains notes that follow a discourse node naming convention — for example titles like CLM - Coral bleaching is accelerating — you can identify them as discourse nodes all at once instead of converting them one by one.
Bulk identify discourse nodes scans your vault for notes whose titles match the patterns you choose, lets you review the matches, and then tags the ones you select with the right node type.
This is a local operation on your own vault. It is unrelated to Sync and import, which shares nodes with collaborators through the Discourse Graph database.
Before you start
Set up your node types first. The scan can only match against node types that already exist in your settings, and it uses each type’s configured format as the starting pattern.
Run the bulk identification
Step 1: Open the command
- Open the command palette with
Cmd/Ctrl + P - Search for “Bulk” and select Discourse Graph: Bulk identify discourse nodes
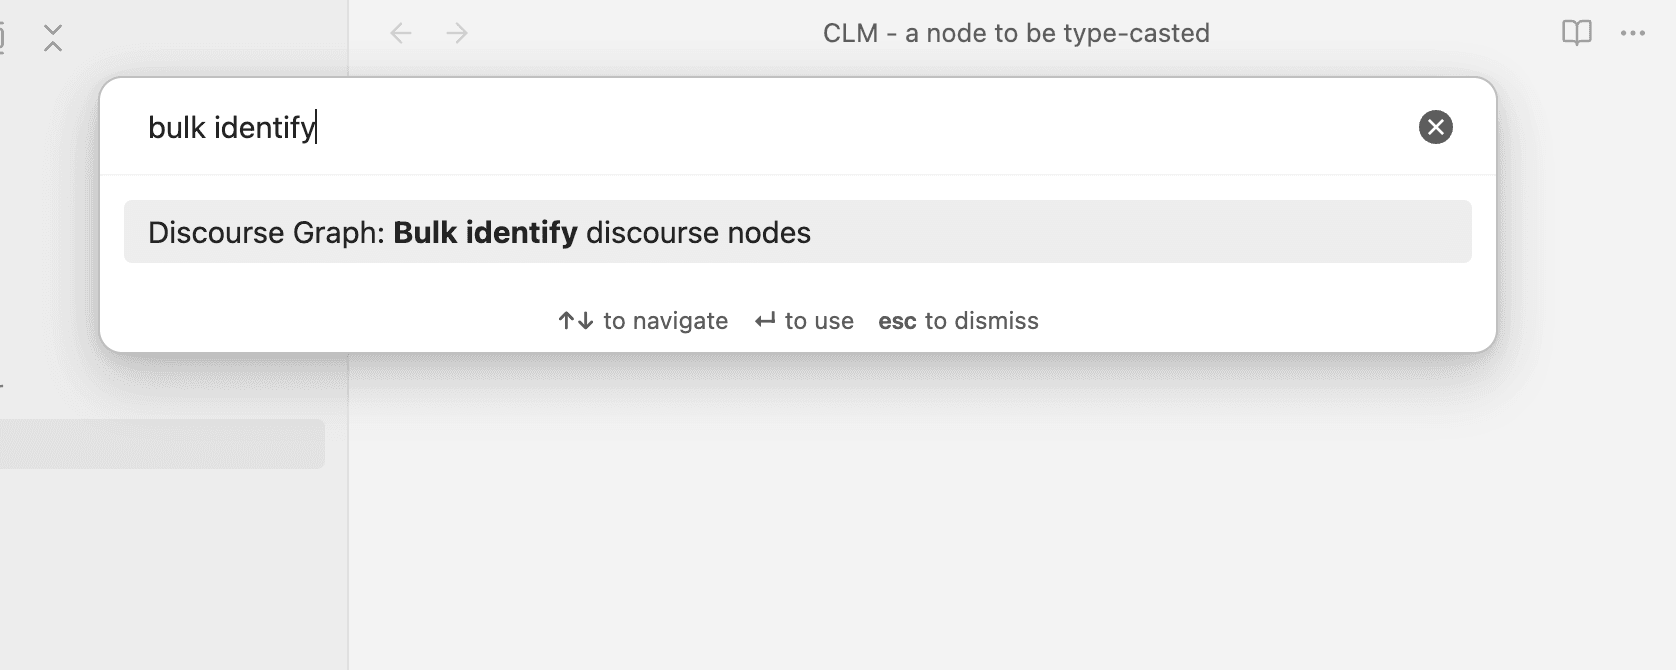
Step 2: Configure identification patterns
The modal opens on Configure Identification Patterns, listing every node type in your settings. All types start disabled.
- Tick the node types you want to scan for, or click Enable All
- Each enabled type shows an editable pattern, pre-filled with that type’s configured format
- Adjust the pattern if your notes use a different convention than your node type format. Use
{content}as the placeholder for the note’s main text — for example, set the pattern toC - {content}if your existing claim notes are titled that way instead ofCLM - {content} - Click Scan Vault
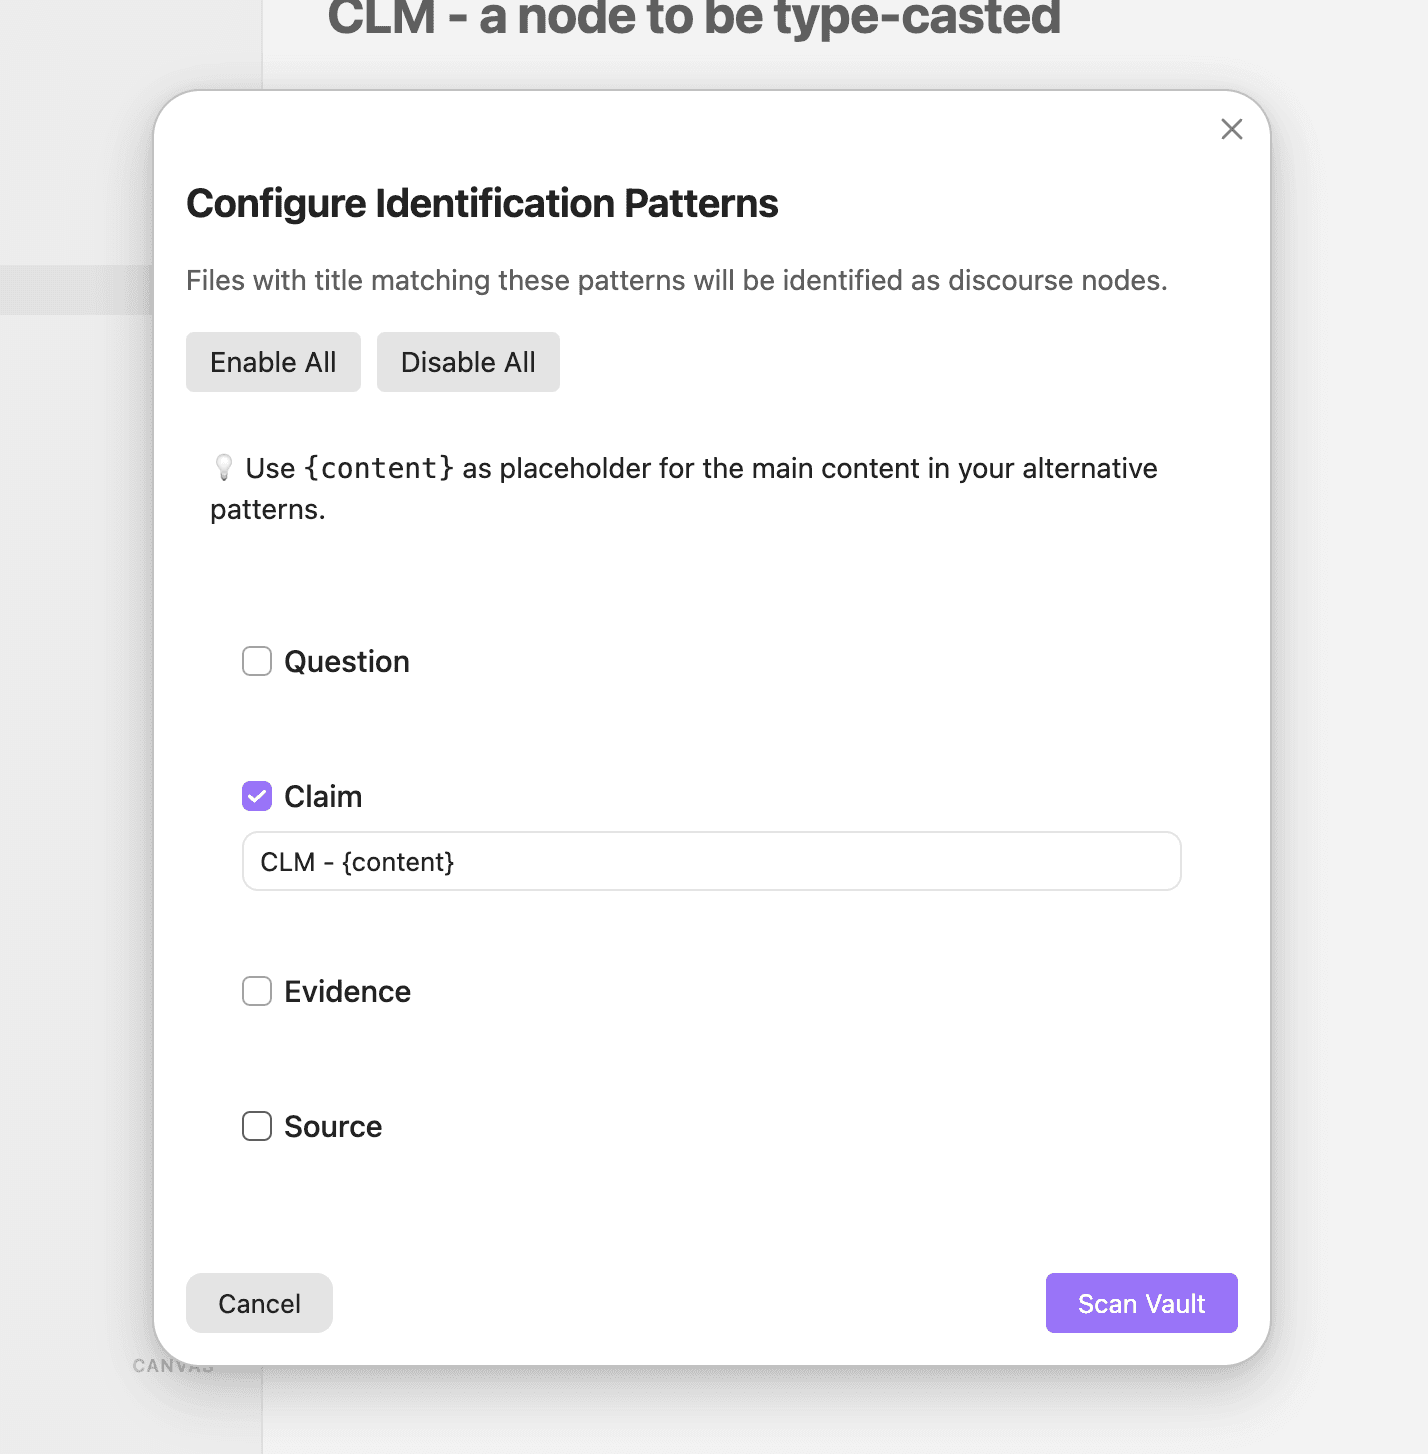
Scan Vault stays disabled until at least one node type is enabled.
How patterns are matched
- Patterns match a note’s title only. Note content is never scanned.
- The pattern must match the whole title, from start to end.
CLM - {content}matchesCLM - Coral bleaching is accelerating, but notDraft: CLM - Coral bleaching is accelerating. {content}stands in for any text.- Text outside
{content}is matched as written, so spacing and punctuation must line up exactly — with the exception of the characters described in the warning below. - Notes that already carry one of your currently configured node types are skipped, so re-running the scan will not produce duplicates.
- If a title matches more than one enabled pattern, the first match wins, following the order your node types appear in settings.
Warning: Patterns are not fully escaped before being turned into a matcher. The characters
(,),*,|,^, and$are interpreted as regular-expression syntax rather than as literal text. A pattern containing them can silently fail to match the notes you intended, or match far more notes than you intended — for example,CLM|{content}matches every note in the vault. Prefer simple prefixes and separators likeCLM - {content}, and always review the candidate list before confirming.
Step 3: Review candidates
The Review candidates step shows how many matches were found, grouped by the folder each note lives in. Notes in the vault root appear under (Root).
- Tick individual notes, tick a folder header to toggle everything inside it, or click Select All
- Click Identify selected as discourse nodes — the button shows the number currently selected
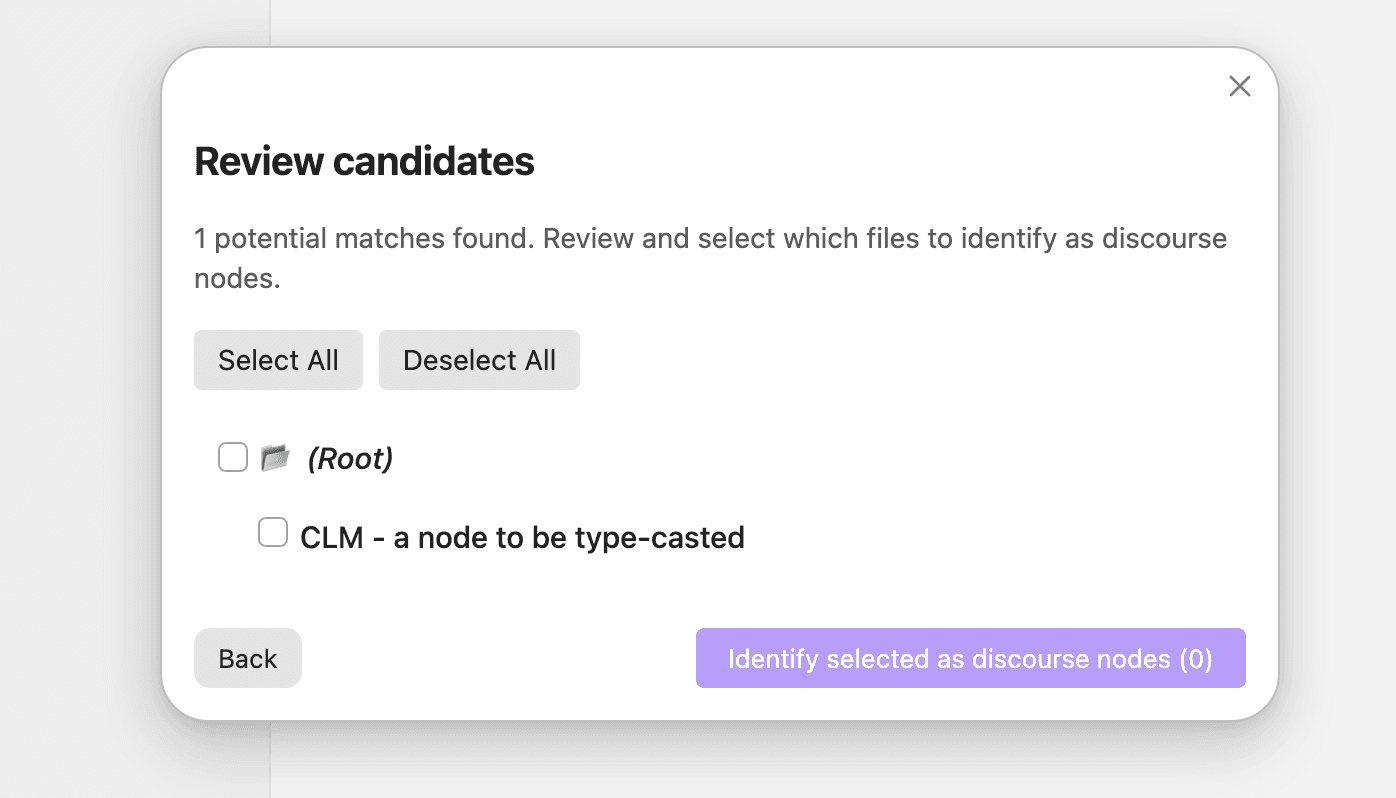
Nothing is selected by default, and the confirm button stays disabled until you select at least one note. Click Back to return to the patterns step and adjust your patterns.
Step 4: Wait for processing
A progress bar reports how many files have been processed. When the run finishes, a notice confirms how many notes were identified, along with how many were skipped if any failed.

What identification changes
Identifying a note adds a nodeTypeId field to its frontmatter. That is the only change.
Notes keep their existing titles and stay in their current folders. They are not renamed to your node type format, not moved into the node folder set in General settings, and not given the node template for their type. No other frontmatter is touched.
Warning: If a note already has a
nodeTypeIdthat is not one of your currently configured node types — for example, one left behind by a node type you since deleted or renamed — the scan still treats that note as a candidate, and identifying it overwrites the existing value. Only notes carrying a currently configured node type are excluded.
Warning: There is no bulk undo. To reverse an identification, remove the
nodeTypeIdfield from the affected notes yourself, or restore them from a backup or version control. Consider running the scan on a small selection first to confirm your patterns behave the way you expect.
Troubleshooting
- No candidates found — Check that the pattern matches the full title, including spacing around separators. A pattern of
CLM -{content}will not match a note titledCLM - Coral bleaching is accelerating. - Notes you expected are missing from the list — They may already be identified as discourse nodes. Notes carrying one of your currently configured node types are excluded from the scan. Notes with a
nodeTypeIdthat no longer matches a configured node type are still included, and identifying them replaces that value. - A note was matched as the wrong type — Two enabled patterns overlapped. Disable the competing node type and scan again, or make the patterns more specific.
- “Problem processing [note]‘s frontmatter. Preserved original content.” — The plugin could not update the note’s existing frontmatter, so it added a new frontmatter block instead and kept the note’s content intact. Open the note to check the result.
- “Failed to process [note]. Skipping…” — The note could not be written to and was left unchanged. Identify it individually using the Convert into flow described in Creating discourse nodes.
Related
- Creating discourse nodes — convert a single note into a discourse node
- Node types and templates — set up the formats the scan matches against